Fanvil iw30 Speaker
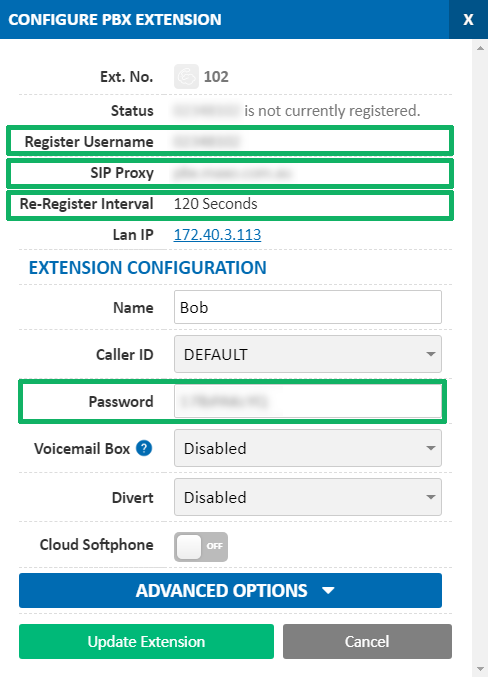
Before you begin, ensure that you've created your extension in the My Account Portal, https://my.maxo.com.au/. To retrieve the details of an existing extension, or create a new extension, login to the My Account Portal and select PBX Extensions or SIP Trunks from the menu, depending on your service type. If you're creating a new extension, click the Add Extension button, fill in the details and click Save. For additional information on creating an extension, please see Portal Guide - PBX Extensions and Sip Trunks Find the extension number you're configuring, then click Edit. Take note of the following fields, highlighted in the image below, as you'll need these to setup the device. Note that if the extension is already configured on a device, you'll need to reconfigure, power down or factory reset the currently connected device before the required information will be displayed.
Note: If your phone has been used with another provider in the past, please factory reset it before continuing. To do so, hold RST for 3 seconds. The unit will restart to apply the default configuration.
Retrieving the speaker's IP address
Press and hold the volume down button for 3 seconds and the speaker will announce the IP address.
Alternately you can find the IP address by logging into your router or using a 3rd party network scanner program such as Fanvil's 'iDoor Phone Network Scanner'.
Access the web interface
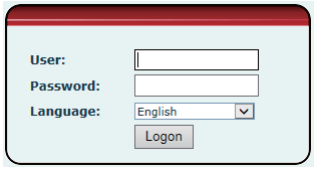
Access the web interface by typing the IP address into a web browser on a computer connected to the same network as the speaker, then enter the speaker's username and password and click Logon.
By default, the username is 'Admin' and the password is 'Admin'
Configuration Settings
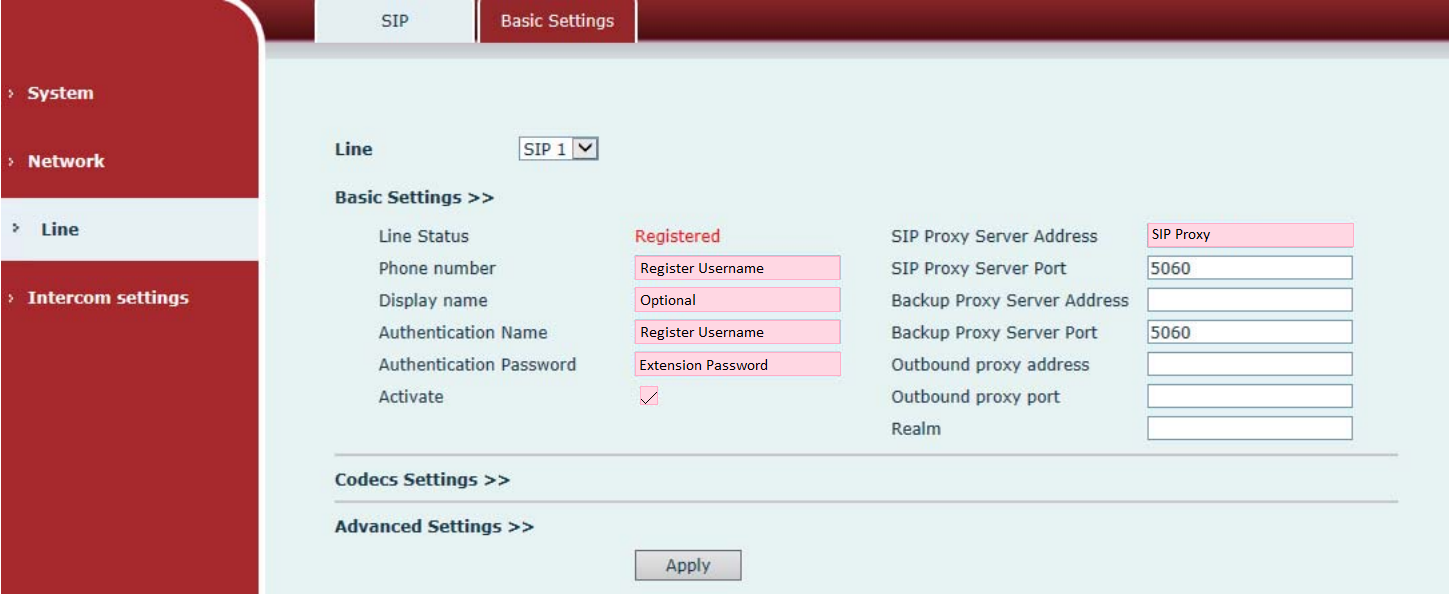
On the left hand side click 'Line"
Fill in the highlighted fields below, copying the Register Username, Extension Password and SIP Proxy from the configure PBX Extension dialog:
| Fanvil | My Account Portal |
|---|---|
| Phone Number | Register Username |
| Authentication Name | Register Username |
| Authentication Password | Extension Password |
| SIP Proxy Server Address | SIP Proxy (usually pbx.maxo.com.au or sip.maxo.com.au) |
Make sure the activate box is ticked.
Click Advanced Settings.
Amend the Registration Expiration to 120 set Caller ID Header to RPID-FROM and uncheck Enable Rport as highlighted below:
Click Apply.
On the left hand side, click Intercom settings
Amend Enable Auto Answer to Disabled and check Description matches Display name, if it was set earlier.
Click Apply.
OPTIONAL: Set the speaker to a static IP
PRESS AND HOLD the volume up button for 10 seconds or until the speaker issues a rapid beep
Press the volume up key 3 times, the beeping will stop, wait 10 seconds
The speaker will then voice the new IP address.
 Australian Sales team about our phone system plans?


