Snom Setup Guide
Snom Handset Setup Guide (370, 815, 875 and more)
Before you begin, ensure you've created your extension in the My Account Portal, https://my.maxo.com.au/. To retrieve the details, or create an extension, login to the My Account Portal, then select PBX Extensions or SIP Trunks from the left menu. If creating a new extension, click the Add Extension button, fill in the details and click Save. Find the extension number you're configuring, then click Edit.
As we'll be using the web interface of the phone to complete this configuration, you'll need to retrieve the phone's local IP address. Press the Settings button, then select Maintenance or Information (depending on your handset) and choose System Info. Copy the IP address into a web browser on your computer.
Enter the admin username and password, if it has previously been set. If it hasn't, you can optionally update this now.
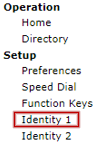
From the menu, select Identity 1
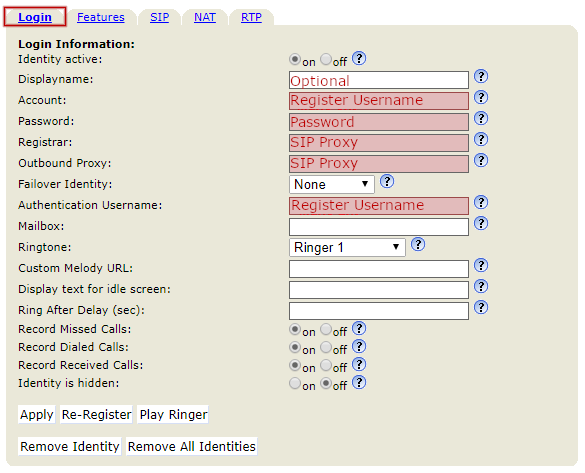
Choose the Login tab, then enter the following using the values from the extension in the My Account Portal:
- Display Name: Name
- Account: Register Username
- Password: The extension's password
- Registrar: SIP Proxy
- Outbound Proxy: SIP Proxy
- Authentication Username: Register Username
Set the Mailbox field to 50002
Once filled in, click Apply.
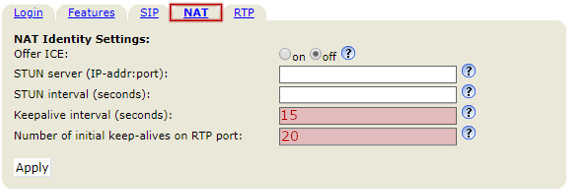
Select the NAT tab, then update the following values and click Apply:
- Keepalive interval: 15
- Number of initial keep-alives on RTP port: 20
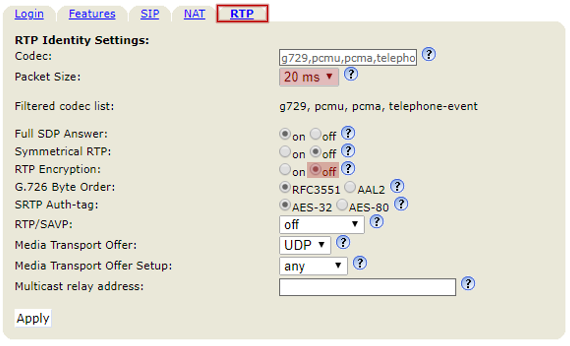
Select the RTP tab, then update the following values and click Apply:
- Packet Size: 20ms
- RTP Encryption: No
On the left menu, select Advanced,
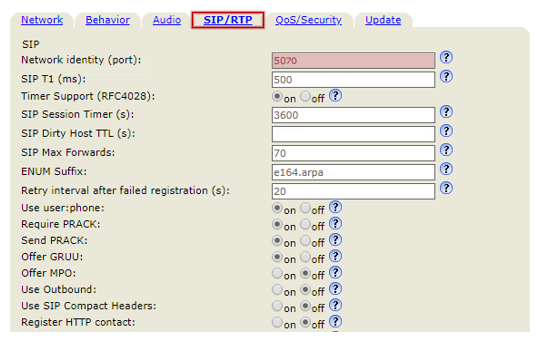
Select the SIP/RTP tab, update the following field and click Apply:
- Network identity (port): This should be unique per extension. We recommend setting the first phone to 5070, then for each additional handset, incrementing by 1 (Handset 1 = 5070, Handset 2 = 5071, Handset 3 = 5072, etc.)
Finally, Save your settings.
 Australian Sales team about our phone system plans?
