Fixing Firmware Update Loops on GRP261X Phones
Your Grandstream handset will automatically update its firmware, however if it gets stuck in a loop, enter our firmware URL to download the intermediary firmware (this allows updating to the latest)
After updating, remember to factory reset the handset, and it will then move to the latest firmware.
To check for and apply firmware updates to your Grandstream GRP2612, GRP2612W, GRP2613, GRP2614, GRP2615 and GRP2616, please perform the following steps on your handset:
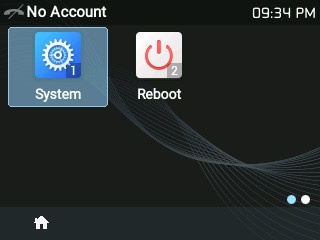
1. Press Menu and navigate to System using the arrow keys, then press Select
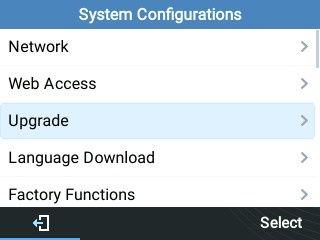
2. In the system options, select Upgrade
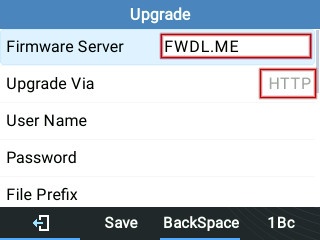
3. Enter the following firmware upgrade url using your phone's keypad. To enter the dot, press the '1' key twice.
FWDL.ME
4. Select HTTP as the upgrade method
5. Press Save, then press Back until you reach the phone's home screen.
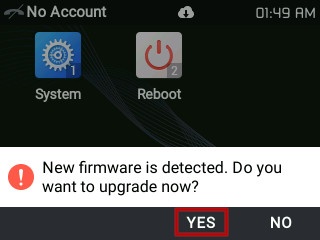
5. Once you see the firmware upgrade popup, select Yes
Once the upgrade has completed, your phone will restart.
Missing Upgrade Prompt
If you've followed the above steps but haven't received the prompt to upgrade, you can try manually triggering the upgrade check by selecting Menu > System > Upgrade > Start Provision.
If the prompt still doesn't appear, your router may be overriding the requests. This behaviour has been seen on Telstra Smart Modems in a DOT environment, but may affect other routers. To stop this override, it's necessary to modify a setting in the handset's web interface.
To access the web interface first retrieve the phone's IP by pressing the menu key, then choosing Status > Network Status. Note down the IPv4 Address, then enter it into a web browser on a computer connected to the same network.
At the Grandstream login prompt, enter the username 'admin'. The password will be 'admin' if your phone is already provisioned to your MaxoTel service, or will be listed on a sticker on the bottom of your handset.
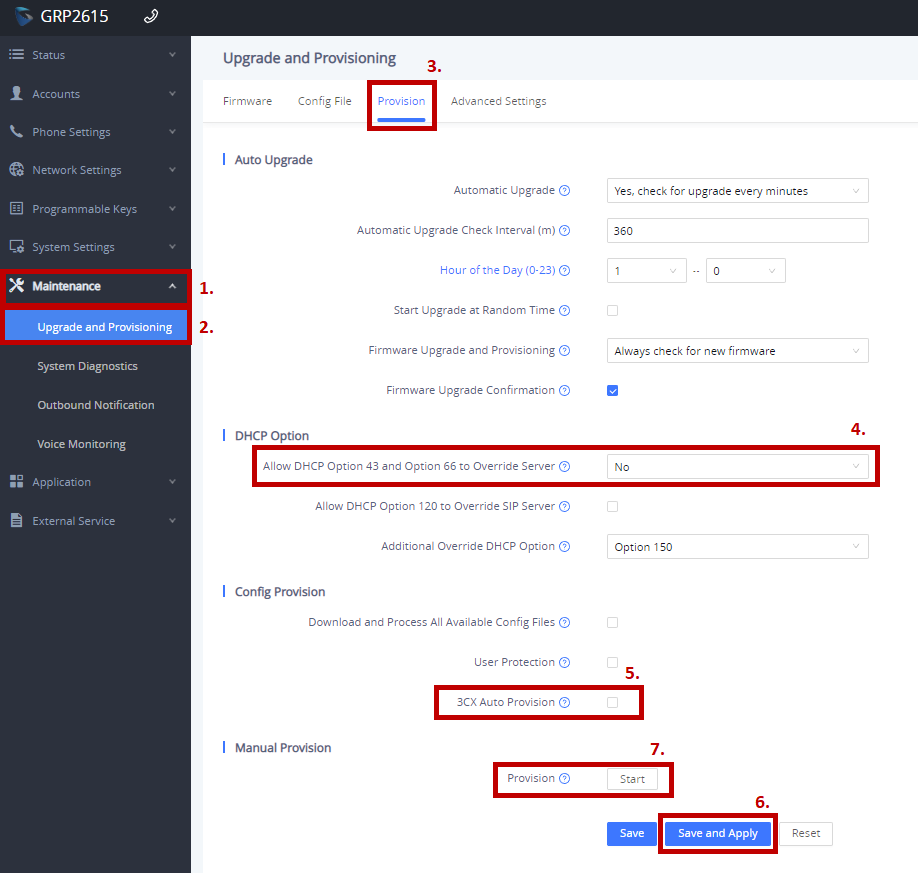
Once logged in, navigate to Maintenance > Upgrade and Provisioning > Provision.
Set the field 'Allow DHCP Option 43 and Option 66 to Override Server' to No.
Deselect the check box '3CX Auto Provision'.
Click Save and Apply.
Once the settings have been saved, locate 'Provision', then click Start.
(For older firmware: Provision can be found in Maintenance > Tools. Locate Auto Provision then click Start.)
You should now receive the prompt on your phone to begin the upgrade process.
 Australian Sales team about our phone system plans?
